

Drawing Earthwork Poche Patterns
Choose the size of your drawing. Poche patterns do not have a scale. They are purely a visual representation of materials. However, poche patterns should communicate the material, while representing the projected size of materials.
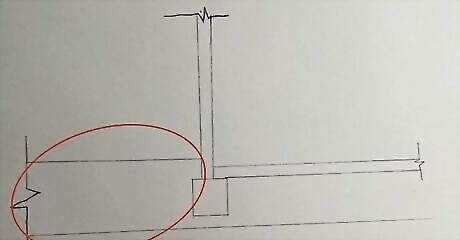
Identify the area that needs poched. Earthwork poche patterns only go where the earth is. The most common place you may need them is when you poche a section cut that may include part of the structure that is below the surface of the Earth.
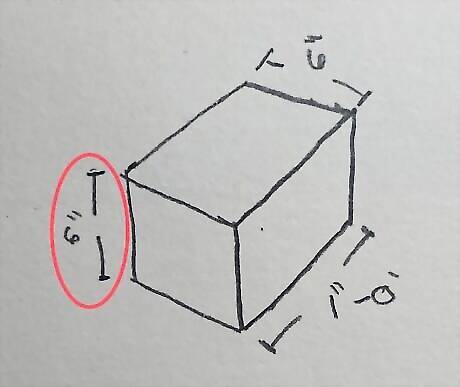
Draw a small square. This square should be equivalent to about two feet tall and wide depending on the scale of the drawing. This square does not need to be exact, but you should be able to fit at least four of the squares into the desired area. The more squares you can fit the better.
Split the square into thirds. Draw two vertical lines with the help of a triangle. These two lines should be dark.

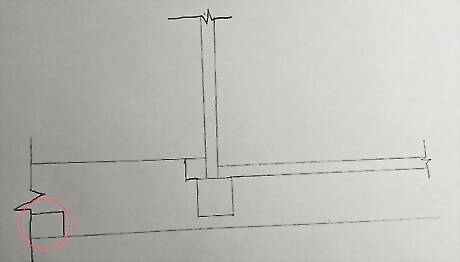
Draw a square connecting to the initial square. The square should be the same size as the initial square. Draw this square above, below, or laterally from the initial square.
Split the square into thirds. The lines of this square should be horizontal, use a triangle to help keep them straight. Ensure that these lines are dark.
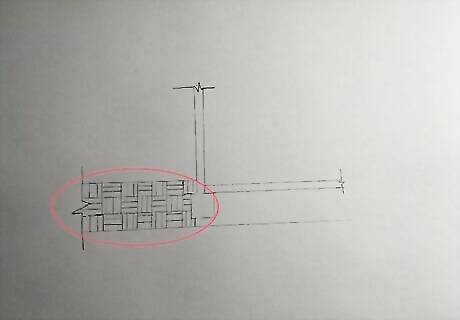
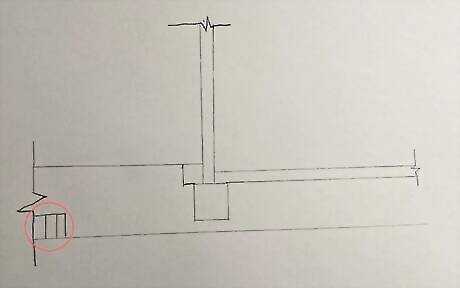
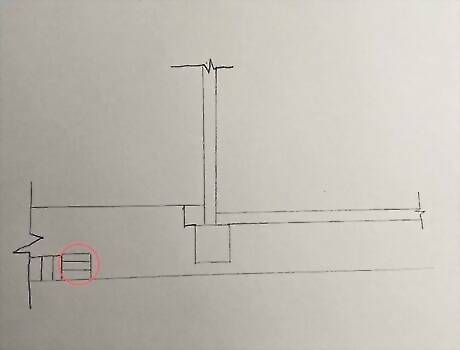
Repeat this process until the desired area is filled with earth poche. The squares should alternate in the vertical and horizontal plane between vertical thirds and horizontal thirds.
Drawing Wall Poche Patterns
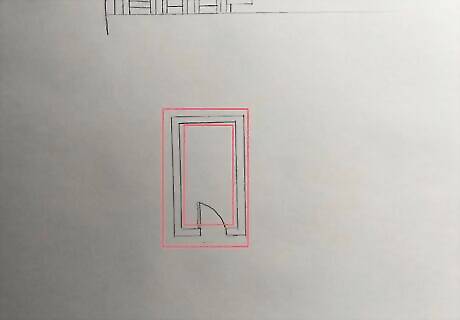
Identify the walls in the drawing. Walls are often drawn with the darkest lines on the floor plan. The wall cavity is what will be poched.
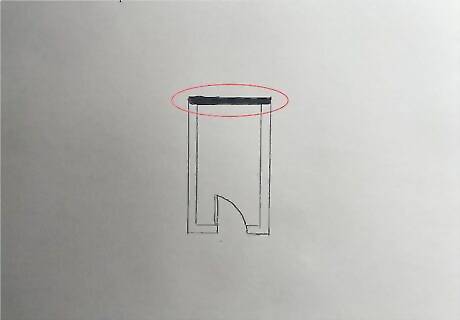
Fill the wall cavity with a solid dark color. Use a 6B pencil for the best results, but any pencil will work. Ensure the color is even throughout the cavity. Avoid over filling because it can make the fill seem shiny.Walls are poched with a solid black because most often they are above what is called the cut line. The cut line is where the structure is “cut” to see the floorplan. The darker the line, the closer to the cut plane the structure is.
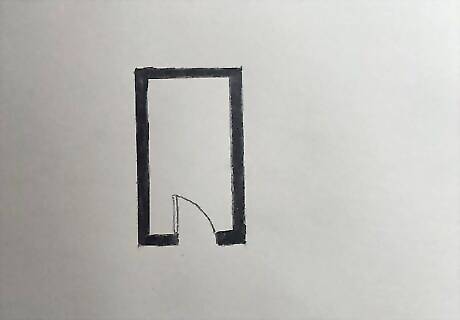
Repeat this process until every wall cavity has been filled. Fill each wall cavity with the solid dark color. Ensure the shade is congruent throughout the entire structure.
Drawing Structural Steel Poche Patterns
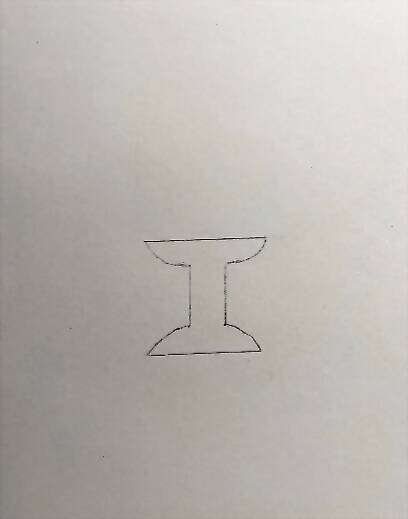
Determine which structures are structural steel. Most often structural steel won’t be poched unless looking at a detail drawing. On a floor plan it will most likely be filled with a solid dark color.
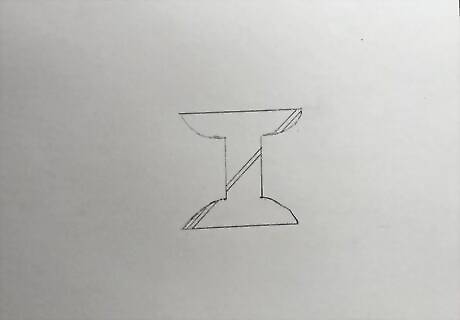
Draw two lines spaced closely together at a 45-degree angle. These lines should span across the entire structure. If the line meets the edge of the structure, but the lines would meet the structure again continue the line, but make sure to only poche the structure.
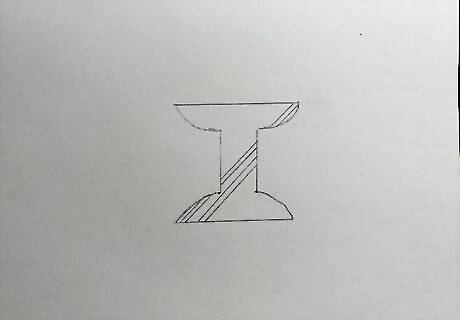
Draw two more lines spaced closely together at a 45-degree angle. Double the spacing between the initial two lines and start the new set of lines there.
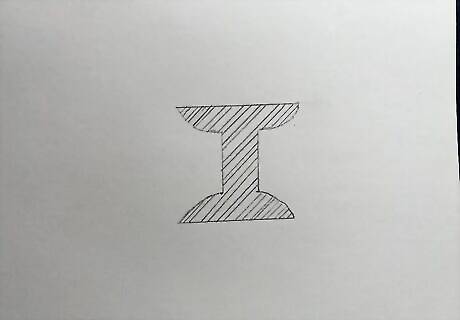
Repeat this process until the structure has been filled with the poche pattern. Continue the process again until the entire desired structure has been filled with the poche pattern. This may take some time to do by hand. The lines do not need to be exactly the same distance apart every time. Remember poche patterns are only a visual representation of the material and not something that needs to be super precise.
Drawing Masonry Poche Patterns in Elevation Drawings
Identify the type of drawing for the poche pattern. There are different techniques that depend on the type of drawing.

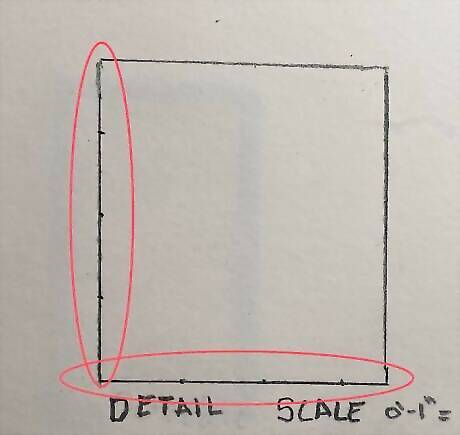
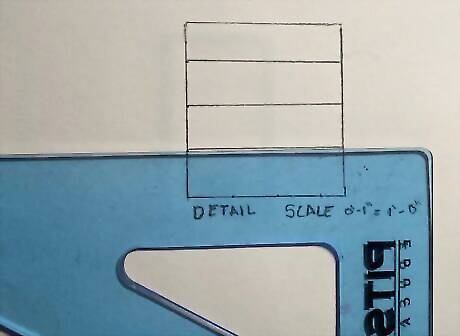
Identify the scale of the elevation drawing. The scale is important for drawing masonry because masonry units have a specific height and width.

Determine the height of the masonry unit. The height of the masonry unit is all that is necessary for the elevation poche pattern.
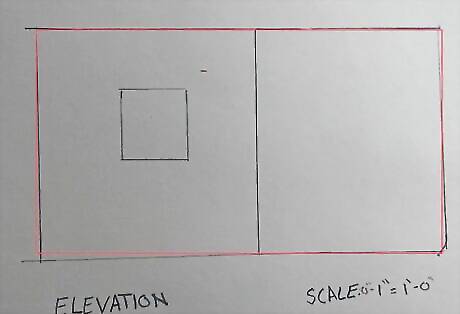
Identify the area that needs poched. Decide what area of the drawing needs to be poched. Identification of the area of work is important to not accidentally poche the wrong piece of the structure.
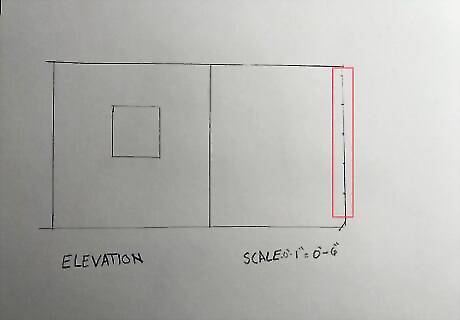
Use the scale to make marks where each of the mortar lines will be. Once the scale and the height of the masonry unit have been determined use the scale to mark where the rows of masonry units will be placed.

Draw horizontal lines at each tick mark. Use a triangle or a parallel to draw perfectly horizontal lines across the area that you desire to poche. These lines represent the mortar joints between each masonry unit.
Drawing Masonry Poche Patterns in Detail Drawings

Identify the scale of the detail drawing. The scale is important for drawing masonry because masonry units have a specific height and width.
Identify the height and width of the desired masonry unit. The height and width of the masonry unit will be important because each unit will need to be illustrated.
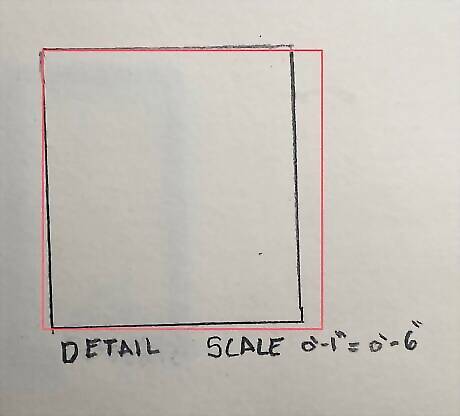
Identify the area that needs to be poched. Decide what area of the drawing needs to be poched. Identification of the area of work is important to not accidentally poche the wrong piece of the structure.
Use the scale to mark both the height and width of the masonry units. By marking the height and the width along the edge of the desired area it will provide you with guidelines to use when placing the mortar joints.
Draw Horizontal lines at each tick mark. Use a triangle or a parallel to draw horizontal lines perfectly across the desired area at each of the marks along the vertical axis of the desired area.
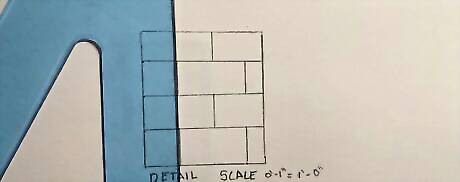
Draw vertical lines at each tick mark along the horizonal axis. Use a triangle to help draw vertical lines at each of the tick marks. You must skip a horizontal row for each vertical line. Ensure that the vertical lines are offset halfway between the other vertical mortar joints.


Comments
0 comment